+91 8810327971
hello@vanityx.shop
Rohini Sector 4, North-west Delhi 110085
![]()


Welcome to the world of makeup! In this beginner’s guide, we will take you on a journey to unlock the secrets of applying makeup, step by step. Get ready to enhance your natural beauty and embrace your inner makeup artist!
So, what exactly is makeup? Well, it’s like art for your face—a magical transformation that allows you to express yourself and boost your confidence. People wear makeup for various reasons: to enhance their features, hide imperfections, or simply because it makes them feel good. And guess what? There are countless benefits to wearing makeup, too! It can give you a sense of empowerment, a boost of self-esteem, and even allow you to unleash your creativity.
Before diving into the world of foundations, concealers, and eyeshadows, it’s important to prepare your skin properly. Think of your skin as a canvas, and preparing it is the key to a flawless masterpiece. Start by cleansing your face to remove any dirt or impurities. Then, moisturize to hydrate and nourish your skin. Finally, apply a primer to create a smooth base for your makeup to adhere to. This trio of skincare steps will ensure that your makeup lasts longer and looks amazing.
Now that your canvas is prepped, it’s time to apply foundation. But wait, choosing the proper foundation is crucial. Consider your skin type, undertone, and coverage preferences before picking the perfect shade. Once you’ve found the foundation that fits you like a glove, apply it using a brush or sponge, blending it evenly for an airbrushed finish.
To hide those pesky imperfections, reach for a trusty concealer. Apply it under your eyes to banish dark circles and brighten up your complexion. Don’t forget to color correct if needed – green for redness, peach for dark spots, and so on. Blend, blend, blend to seamlessly camouflage any areas you want to disguise.
Now, let’s move on to enhancing your features. Start by adding warmth and dimension to your face with bronzer. Apply it to the hollows of your cheeks, temples, and jawline for a sun-kissed glow. Next, add a pop of color to your cheeks with a blush. Smile and apply it to the apples of your cheeks for a youthful flush. Want to turn up the radiance? Highlighters are your best friends! Apply it to the high points of your face – cheekbones, brow bones, and cupid’s bow – for an ethereal glow.
Ah, the eyes, the windows to our souls. Give them the attention they deserve by applying eyeshadow, eyeliner, and mascara. Play with different eyeshadow shades and textures to create stunning eye looks. Then, define your eyes with eyeliner – whether you prefer a classic wing or a smokey effect. Finally, finish off your eye makeup with a coat or two of mascara for long, luscious lashes.
Lastly, don’t forget the finishing touches. Swipe on some lip gloss for a glossy pout, and seal your makeup with a setting spray or powder to ensure it stays put all day long.
And there you have it, a beginner’s guide to applying makeup step by step. Remember, makeup is all about self-expression and having fun. So, unleash your inner artist and let your creativity shine!
Makeup, makeup, makeup! It’s a magical tool that helps us unleash our inner beauty and boost our confidence. But what exactly is makeup? Well, my friends, makeup is like an artist’s palette that allows us to enhance our favorite features and create beautiful looks that reflect our definitions of beauty. It’s a world of colors, textures, and endless possibilities.
Now, let’s dive into the reasons why people wear makeup. Some do it to cover up imperfections and feel more confident in their skin. Others use it as a form of self-expression and creativity. And let’s not forget those who wear makeup simply because it’s fun and makes them feel glamorous. There’s no right or wrong reason to wear makeup, as long as it makes you feel good about yourself.
But wait, there’s more! Wearing makeup comes with its fair share of benefits. Not only can it enhance your natural beauty, but it can also boost your self-esteem and give you a confidence boost. It’s like putting on a superhero cape, but instead of fighting crime, you’re conquering the world with your flawless face. Plus, makeup can be a form of self-care and a way to pamper yourself. So go ahead, and indulge in that luxurious foundation or that stunning lipstick. You deserve it!
Now that we’ve covered the basics of makeup, let’s move on to the next step: preparing your skin. Trust me, even the most expensive makeup won’t look good if your skin isn’t properly prepped. So grab your favorite cleanser and give your face a good wash. Follow it up with a hydrating moisturizer to plump up your skin and create a smooth canvas for your makeup. And don’t forget the primer! It’s like the fairy godmother of makeup, ensuring that your foundation stays put and your makeup lasts all day.
Oh, did I mention that applying makeup is like an art form? Well, it is! And just like any artist, you need the right tools and techniques. But fear not, my dear beginners. I’m here to guide you through the mystical world of brushes, sponges, and blending. Together, we’ll conquer the art of foundation application, concealing and correcting, enhancing your features, and creating stunning eyes. And once we’re done, we’ll finish it off with a touch of lip gloss and a spritz of setting spray to lock in your masterpiece.
So there you have it, a beginner’s guide to the wonderful world of makeup. Whether you’re a makeup aficionado or just starting your journey, remember that makeup is all about having fun, expressing yourself, and embracing your unique beauty. So go forth, my makeup-loving friend, and conquer the world, one swipe of lipstick at a time. Stay fabulous!
When it comes to makeup application, the key to achieving a flawless look starts with prepping your skin. Think of it like preparing a canvas before creating a masterpiece. Cleansing your face, moisturizing your skin, and using a primer are essential steps in ensuring that your makeup goes on smoothly and lasts all day.
First things first, let’s talk about cleansing. That magical moment is when you wash away the day’s dirt and grime. Cleansing your face is not only refreshing but also important for removing any impurities that could interfere with the application of your makeup. So, grab your favorite cleanser and give your face a good cleanse to start with a fresh canvas.
Now that your skin is clean, it’s time to moisturize. Moisturizing your skin is like giving it a big drink of water. It hydrates and nourishes your skin, creating a smooth and plump surface for your makeup. Plus, it helps to prevent any dry patches or flakiness that can make your makeup look patchy. So, slather on some moisturizer and let your skin soak in all the goodness.
But wait, there’s more! Don’t forget the primer. Think of a primer as the glue that holds your makeup together. It fills in fine lines and wrinkles, blurs imperfections, and creates a smooth base for your foundation. Not to mention, it helps your makeup last longer throughout the day. So, grab your favorite primer and apply a thin layer all over your face.
Now that you have cleansed, moisturized, and primed your skin, it’s ready for the next step in your makeup routine. With a fresh canvas, you’re all set to create a stunning look that will turn heads wherever you go. So, grab your brushes, embrace your inner artist, and let the magic of makeup begin!
Disclaimer: No actual canvases were harmed or used in the making of this makeup routine. Skincare is important, but please refrain from using cleanser, moisturizer, or primer on any actual artwork. That would be a disaster, trust us.
When it comes to applying foundation, it’s a whole new ball game. But don’t worry, we’re here to guide you through this maze of choices and techniques. So grab your makeup brushes and get ready to create a flawless base.
Choosing the right foundation is key. You don’t want to end up looking like a mismatched statue. Consider factors like your skin type, undertone, and desired coverage. And trust us, finding the perfect shade is like finding a needle in a haystack. But hey, no pressure!
Now that you have your foundation, it’s time to apply it like a pro. Start by applying a small amount to the back of your hand. We know it sounds like an odd ritual, but it helps warm up the product and ensures a smooth application.
Using a brush or sponge, begin blending the foundation onto your skin. Start at the center of your face (hello, T-zone!) and work your way outwards. Make sure to blend it down towards your neck to avoid any awkward line of demarcation. We don’t want any “floating head” situations here.
Blending is the secret ingredient to a flawless foundation application. It’s like the cherry on top of a cake, except it’s your face. Blend with gentle strokes and patting motions to ensure an even and natural finish. Remember, less is more. You can always add more foundation if needed, but removing excess product is a whole different story.
Now that you’ve got the foundation basics down, it’s time to rock that flawless complexion. Just remember, practice makes perfect. So don’t get discouraged if your first few attempts end up looking like a Picasso painting. Rome wasn’t built in a day, and neither was a flawless face.
Keep experimenting with different techniques and products until you find your groove. And always remember, makeup is an art form. So embrace your inner Picasso and let your creativity shine through.
Now that we’ve tackled foundation application, it’s time to move on to the next step in our makeup journey. Get ready to conquer the art of concealing and correcting! But before you do, don’t forget to grab a cuppa and take a well-deserved break. You’ve earned it!
Now that you have achieved a flawless base with your foundation, it’s time to focus on concealing and correcting any imperfections. Hide those pesky blemishes, dark circles, and redness with the magic of concealer!
To apply concealer, start by choosing a shade that matches your skin tone or is one shade lighter. Using a small brush or your fingertips, dab a small amount of concealer onto the areas that need extra coverage. Blend it gently, using patting or tapping motions to ensure a natural finish.
Now, let’s talk about color-correcting techniques. Remember that color correction is all about using complementary shades to cancel out specific skin concerns.
Green concealer is perfect for neutralizing redness, while peach or orange shades work wonders in counteracting dark circles. If you have dull or sallow skin, try using a lavender or purple corrector to brighten up your complexion. And for those stubborn blemishes or scars, use a yellow or salmon-toned concealer to neutralize any discoloration.
When applying color correctors, use a small brush or your fingertips to target specific areas. Blend it out gently until the colors are seamlessly blended with your skin. Remember to always follow up with your regular concealer and foundation to create a flawless and natural look.
Now that you’ve mastered the art of concealing and correcting, you’re one step closer to achieving a makeup look that will make heads turn! So, go ahead and embrace your uniqueness with confidence. Remember, makeup is all about expressing yourself and enhancing your natural beauty. Keep on experimenting and discovering what works best for you. Happy makeup-ing!
Note: In the next section, we will dive deeper into enhancing your features by applying bronzer, blush, and highlighter. Get ready to take your makeup game to the next level!
Hey there, makeup enthusiasts! Ready to enhance your features and take your makeup game to the next level? We’ve got you covered with this section on enhancing your features. Whether you want to add some warmth to your complexion, bring out your cheekbones, or make your eyes pop, we’ve got the tips and tricks you need.
Let’s start by talking about applying bronzer. Bronzer is like sunshine in a compact. It can give you that sun-kissed glow without the harmful effects of UV rays. Now, the key to a natural-looking bronzed complexion is to choose a shade that is one or two shades darker than your natural skin tone. And remember, a light hand is crucial here. You don’t want to look like you’ve spent a week in Cancun when it’s only Tuesday.
Now, let’s move on to adding blush. Blush is not just for those cute, rosy cheeks you had as a kid. It’s an essential step in adding dimension and a healthy flush to your face. When applying blush, smile to locate the apples of your cheeks and gently sweep the blush upwards towards your temples. Use a light hand to avoid looking like a clown—unless that’s the look you’re going for, then go ahead and clown it up!
Next up, highlight your face. Say hello to that lit-from-within glow! Highlighter is like a magic wand that can instantly make you look more awake and radiant. Apply it to the high points of your face – the tops of your cheekbones, the bridge of your nose, cupid’s bow, and a little bit on your forehead and chin. Just be careful not to go overboard unless you want to blind people with your radiance, which might not be such a bad idea if you want some attention.
And of course, we can’t forget about accentuating your eyes. Your eyes are the windows to your soul, so why not make them pop? Start by applying a neutral eyeshadow shade all over your lids as a base. Then, use a slightly darker shade to define your crease and add depth. Don’t be afraid to experiment with different colors and techniques to create different looks. Whether you want a subtle everyday look or a bold smokey eye, the possibilities are endless.
Now that we’ve covered adding dimension to your face, let’s remember the most important thing – confidence. You can have all the makeup in the world, but if you don’t feel good about yourself, none of it will matter. So embrace your unique features, experiment with different looks, and rock that make up like the fierce and fabulous individual that you are!
Well, there you have it, folks! We’ve reached the end of our section on enhancing your features. Remember, makeup is not about covering up who you are but rather enhancing the beauty that already exists. So go ahead, have fun, and let your inner makeup artist shine! Stay tuned for the next section where we dive into creating stunning eyes. Trust me, you won’t want to miss it!
Now, we come to the most exciting part of your makeup routine – creating stunning eyes that will make heads turn. Whether you want to rock a natural daytime look or go all out with a smoky eye, this section will guide you through the key steps of eyeshadow application, eyeliner techniques, and mascara application.
Let’s start with the eyeshadow application. The key to applying eyeshadow like a pro is to blend, blend, blend! Choose a palette with shades that complement your eye color and the look you want to achieve. Start by applying a neutral shade all over your eyelid as a base. Then, take a slightly darker shade and blend it into the crease of your eye to create depth. Don’t forget to highlight your brow bone and inner corners of your eyes with a lighter shade to make your eyes pop. Remember, practice makes perfect, so don’t be afraid to experiment with different colors and techniques.
Now, let’s move on to eyeliner techniques. Whether you prefer a subtle line or a bold winged look, mastering the art of eyeliner takes time and practice. If you’re a beginner, start with a pencil or gel eyeliner, as they are easier to control. Apply the eyeliner as close to your lash line as possible, starting from the inner corner and working your way out. For a winged look, extend the line slightly beyond the outer corner of your eye and then connect it back to the lash line. Don’t worry if it’s not perfect the first time – you can always clean up any mistakes with a cotton swab dipped in makeup remover.
Last but not least, let’s talk about mascara application. Mascara is a game-changer when it comes to defining and lengthening your lashes. Before applying mascara, curl your lashes with an eyelash curler to open your eyes. Place the curler at the base of your upper lashes, being careful not to grab any of the sensitive skin around your eyelid. Slowly close the curler and hold it in place for a few seconds. Then, release gently. Now, grab your tube of mascara and gently swirl the wand around to ensure all the bristles are coated. Starting from the roots, wiggle the wand upwards through your lashes to evenly distribute the mascara. You can apply multiple coats for a more dramatic look. And voila! You now have long, fluttery lashes that are ready to bat.
Remember, the key to perfecting your eye makeup is practice and experimentation. Don’t be afraid to try new colors, techniques, and styles. After all, makeup is all about expressing yourself and having fun. So, go ahead and unleash your inner makeup artist.
Applying Lip Gloss: Let’s talk about those luscious lips of yours. Applying lip gloss is a simple yet essential step to give your pout a beautiful, glossy finish. Start by choosing a shade that complements your makeup look. Then, use the applicator to swipe the gloss over your lips, starting from the center and
Now that you’ve perfected your base and enhanced your features, it’s time to add the finishing touches to complete your makeup look. And trust me, these final steps are what take your look from good to stunning. So, grab that lip gloss and get ready to set your makeup like a pro!
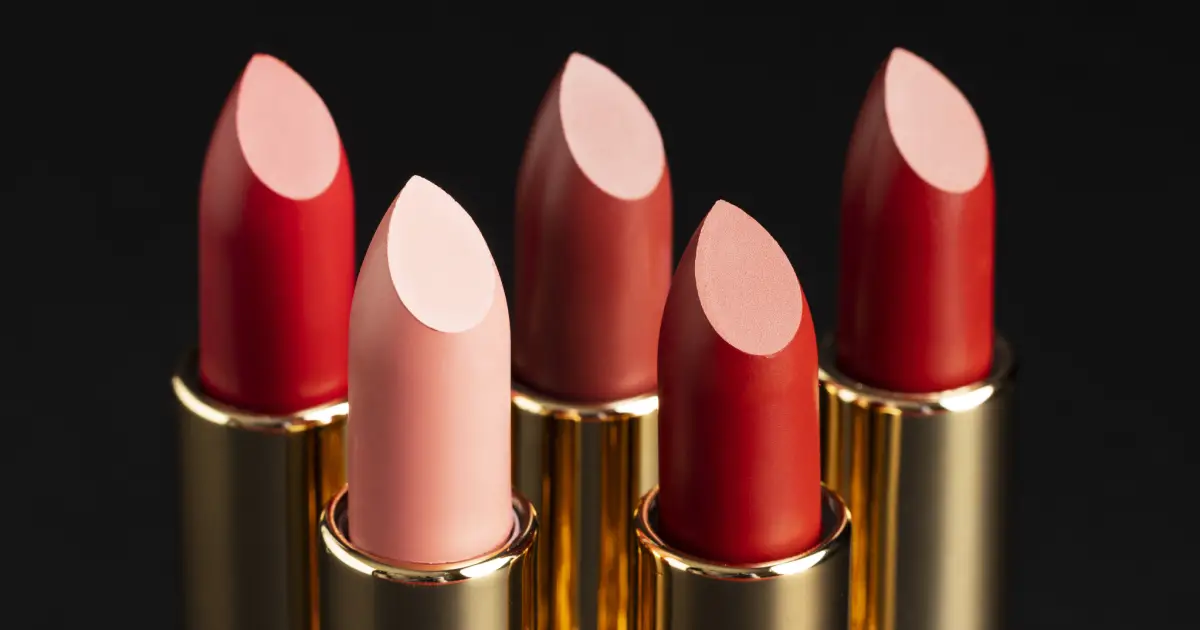
Just in: eye-catching bold lipstick shades! If you follow beauty trends at all, surely this cannot have gone by unnoticed! Trading muted mauves, dusty roses
Welcome to Cosmopolitos.com – your one-stop destination for everything related to makeup sets and kits for girls! At Cosmopolitos, we understand that the world of
Makeup, aaj kal har kisi ki dincharya ka mahatvapurna hissa ban gaya hai. Yeh ek aise kala hai jo humari khoobsurti ko aur bhi nikhar

In the world of cosmetics, a well-curated makeup kit is a girl’s best friend. Whether you’re a makeup enthusiast or just starting your journey into
Welcome to the world of makeup! In this beginner’s guide, we will take you on a journey to unlock the secrets of applying makeup, step
